0%

Custom Leather Goods Manufacturing demands more than attractive sketches and premium hides. It requires disciplined decisions at every stage, from material selection to final inspection. A small wallet may reveal large production problems. Uneven grain, weak edge paint, loose stitching, or poorly fitted hardware can damage an entire collection.

Nick Horween, a fifth-generation leather maker, has said, “No two hides are exactly alike.” That observation guides responsible manufacturing. Leather is not a perfectly uniform sheet. Its scars, pores, stretch, and color shifts affect cutting and assembly. Experienced manufacturers inspect each hide under clear light before creating cutting patterns. They also test samples for abrasion, stitch strength, edge durability, and hardware corrosion. These details protect both product quality and customer trust.

The seven tips in this guide focus on practical control. They cover choosing the right tannery, defining measurable specifications, building useful prototypes, and confirming production tolerances. They also address communication, ethical sourcing, packaging, and quality checks. A polished sample can still hide weaknesses. It may use better leather than the bulk order. It may receive extra handwork. This is where planning must become more honest.

There is no flawless manufacturing process. Even skilled teams encounter color variation or unexpected leather movement. The goal is not to erase every natural difference. It is to manage variation carefully, explain it clearly, and deliver consistent value. Strong Custom Leather Goods Manufacturing combines craftsmanship with documented processes, realistic timelines, and continuous reflection. Small corrections made early often prevent expensive failures later.
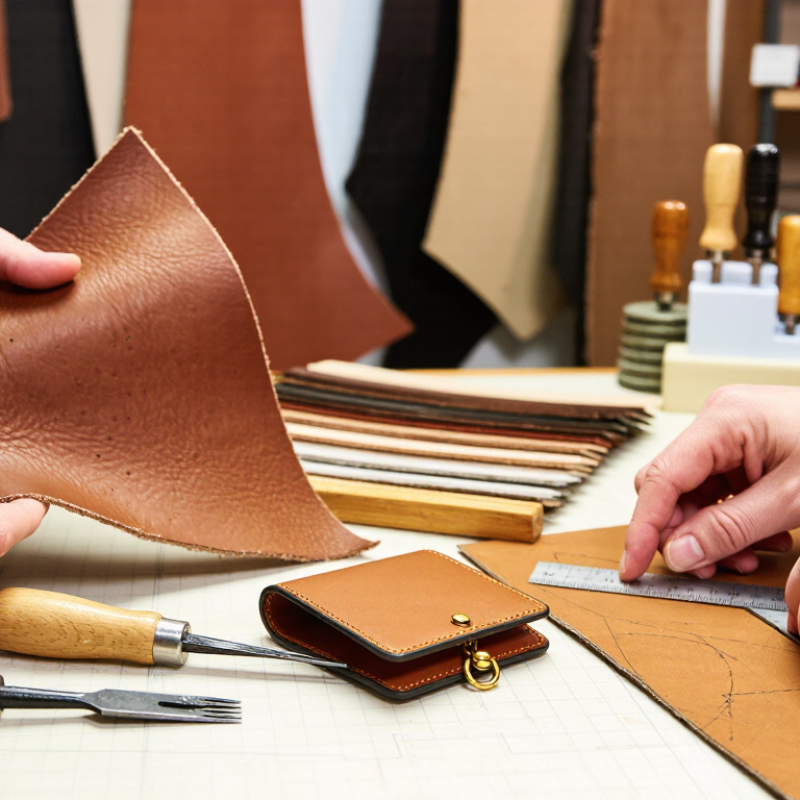
7 Tips for Custom Leather Goods Manufacturing

Define Product Requirements and Customization Goals

Define Product Requirements and Customization Goals

A leather brief should describe the object in use, not just its appearance. Specify dimensions, capacity, leather type, finish, lining, thread color, edge treatment, and hardware. Add expected order quantity, target cost, delivery date, and daily-use conditions.

A slim cardholder used outdoors needs different leather and stitching choices from a desk accessory. Small details matter.

Decide which features customers may customize and which must stay fixed. Too many options complicate sampling, production, and quality checks.

Deloitte’s 2015 report, Made-to-order: The Rise of Mass Personalisation, found that one in five surveyed consumers would pay 20% more for a personalized product.

Treat this as a signal, not a promise of demand for leather goods. Test choices with likely buyers before setting your range.

Write measurable requirements where possible: pocket width, stitch spacing, color reference, and acceptable size variation.

Then review a physical sample under natural and indoor light. Leather varies; a written color description may not capture its grain or tone.

Even a careful specification can miss something. Record the mismatch, revise the brief, and approve a sample before ordering production.

Choose Leather, Hardware, and Supporting Materials

Leather choice should follow the item’s daily use, not appearance alone. A structured tote may need firm leather that holds its shape, while a wallet benefits from thinner, flexible panels. Full-grain leather often shows natural marks, so inspect sample pieces under daylight before approving a color. Ask the supplier about thickness, finish, and how the leather may soften with use. Dye lots can vary slightly.

Hardware affects weight, wear, and comfort. Solid brass can develop a patina; stainless steel usually keeps a more consistent finish. Check that buckles, snaps, and zippers move smoothly without catching the leather. Test a closure repeatedly on a sample, not just once at the workbench. Small details matter.

Supporting materials deserve the same attention. A cotton or synthetic lining can reduce stretching, but its weight should suit the leather. Choose thread with enough strength for the seam and a color that will not distract from the design. Edge finishing also needs testing: a neat painted edge may crack if the leather bends sharply. I have seen prototypes look excellent on a table, then feel stiff in the hand. Make a small working sample and carry it for a few days; that test can reveal flaws a spec sheet misses.

Develop Patterns, Prototypes, and Production Specifications

7 Tips for Custom Leather Goods Manufacturing

Develop Patterns, Prototypes, and Production Specifications

A reliable leather product begins with a precise pattern, not a sketch alone. Record every measurement, seam allowance, fold line, and edge detail. Mark grain direction and expected stretch on each pattern piece. This prevents confusion when several technicians handle the same project. Use durable pattern sheets for repeated sampling. Digital files also help, but physical checks remain essential.

Build a prototype with the intended leather, lining, thread, and hardware. Different hides can change shape after cutting. A firm vegetable-tanned leather behaves differently from a soft, flexible hide. Check pocket access, stitching tension, edge paint thickness, and closure strength by hand. Carry the sample for several days. Real use reveals uncomfortable corners and weak attachment points. Our early patterns were sometimes too generous around the folds. That looked safe. It later caused loose edges.

Production specifications should translate design choices into measurable instructions. State leather thickness, color tolerance, stitch length, thread size, hardware finish, and acceptable surface marks. Include clear photos of approved details. Define inspection points for cutting, assembly, edging, and final packing. Keep revision dates visible on every document. A missing update can create costly inconsistencies. Leave room for judgment. Natural leather will never look perfectly uniform. However, defects affecting strength, function, or appearance need clear limits. Record prototype changes honestly, including mistakes that seem minor. They often explain later production problems.

Assess Craftsmanship and Establish Quality Standards

Assessing craftsmanship starts with the leather, not the logo. The Grand View Research Leather Goods Market Report estimated the global market at USD 242.85 billion in 2023. That scale makes consistent workmanship essential. Ask suppliers to show full hides, not only selected panels. Check grain direction, scars, thickness, and color variation under neutral light. A skilled maker should explain these differences clearly.

Build a written quality standard before sampling. Specify leather thickness, stitch density, edge-paint layers, hardware finish, and acceptable marks. For structure, use ISO 2418 for leather sampling and ISO 3377-1 for tear-strength testing. Test seam strength, abrasion, color transfer, and zipper movement. Use an agreed AQL level for production inspection. Keep golden samples with dated photos. Small details matter.

A perfect sample can still mislead. I have seen clean edges hide weak bonding beneath the surface. Pull-test handles after conditioning them in heat and humidity. Inspect five pieces from the middle of a production batch, not only the first units. Record failures without softening the language. Some standards will need revision after real use. That is not weakness; it is evidence. A supplier who accepts corrective testing is often more reliable than one who promises zero defects.

7 Tips for Custom Leather Goods Manufacturing: Assess Craftsmanship and Establish Quality Standards

Tip What to Assess Inspection Method Suggested Acceptance Standard Quality Record
1. Define leather requirements Leather type, thickness, surface, color, and finish Compare incoming hides or panels with the approved material sample and specification; measure thickness with a leather gauge. Material matches the approved type and finish. Thickness is within the product specification, and visible defects are outside designated appearance zones. Material specification, supplier lot, thickness readings, and defect map
2. Check cutting accuracy Pattern dimensions, edge condition, and panel consistency Measure cut components against approved patterns and inspect edges for unwanted nicks, stretching, or incomplete cuts. Dimensions fall within the drawing tolerance; paired or repeated panels align without forcing during assembly. First-piece inspection and periodic measurement results
3. Inspect stitching quality Stitch spacing, alignment, tension, and thread security Examine seams under good lighting and gently check seam security at stress points. Stitching is consistent with the approved sample; there are no skipped stitches, loose loops, broken threads, or visibly uneven seam lines. Seam inspection checklist and photos of any nonconformity
4. Evaluate edge finishing Edge paint, burnishing, folding, and coverage Inspect edges along the full perimeter for smoothness, adhesion, even color, and clean joins. Edges are uniformly finished with no peeling, exposed core, rough areas, or conspicuous gaps at corners and joints. Edge-finish sample approval and batch inspection notes
5. Test hardware and attachments Zippers, snaps, buckles, rings, rivets, and handle attachments Operate each closure and check attachment points for movement, sharp edges, or surface damage. Hardware operates smoothly and remains securely attached during the product-specific functional test; plating or coating has no unacceptable defects. Functional test results and hardware lot details
6. Verify construction and dimensions Overall shape, symmetry, lining, pockets, and assembly Measure the finished item against the approved specification and check seams, lining, and compartments for correct placement. Critical dimensions meet drawing tolerances; the item sits evenly, components are correctly positioned, and the lining is secured without excessive wrinkles. Final dimensional report and assembly inspection checklist
7. Set a documented final inspection Appearance, function, cleanliness, and packaging Inspect finished goods against a signed reference sample and use a repeatable sampling plan appropriate to order size and risk. Critical defects are not accepted; major and minor defect limits are defined in advance, and every unit meets agreed functional and presentation requirements. Approved quality plan, inspection report, defect log, and corrective-action record

Suggested standards are starting points. Set final tolerances, test methods, and defect limits in the product specification before production.

Plan Production Capacity, Lead Times, and Costs

Custom leather goods need a capacity plan built around operations, not optimistic unit targets. Map each step: hide inspection, cutting, skiving, stitching, edge finishing, and final checks. Then time a pilot batch, including setup and changeovers. A Federal Reserve G.17 report put U.S. manufacturing capacity utilization at about 76.7% in August 2024. That broad benchmark is not a target for a leather workshop; it does show why planning every workday at full capacity leaves little room for disruption.

Set lead times using the slowest constrained process, often skilled stitching or hand-finished edges. For example, a batch of 200 wallets may need only a day of cutting, yet require several days of sewing and finishing. Confirm hide availability and color consistency before promising a ship date. The U.S. Bureau of Labor Statistics’ Producer Price Index tracks price movements across leather and allied products; compare it with current supplier quotes, since an index cannot predict the cost of a specific hide grade.

Build the quote from material yield, labor minutes, hardware, packaging, and rework allowance. Track actual hours and scrap from each run, then revise estimates. Leave room for rework. One uncomfortable truth: early estimates are often wrong, especially when a new pattern uses more leather than expected. Record the miss, adjust the next quote, and avoid hiding uncertainty inside an unrealistically short lead time.

FAQS

What should a product brief include for a custom leather item?

Specify dimensions, capacity, leather, finish, lining, thread, edges, and hardware. Include order quantity, target cost, delivery date, and expected daily use.

How can I decide which features customers may customize?

Offer a focused set of choices, such as thread color or pocket layout. Test those options with likely buyers; interest in personalization does not guarantee sales.

Why should I approve a physical sample?

Leather grain and color can look different under daylight and indoor lighting. A sample may reveal a mismatch that written specifications miss.

How do I choose leather for a specific product?

Match it to the item’s use. Firm leather can help a tote hold its shape, while thinner, flexible panels may suit a wallet.

What should I check on hardware and supporting materials?

Test snaps, zippers, and buckles repeatedly to make sure they move smoothly. Check lining weight, thread strength, and whether a painted edge cracks when bent.

How can a working prototype catch design problems?

Carry it for a few days. A prototype that looks neat on a table may feel stiff in your hand.

How should I estimate production lead times?

Map each operation, then time a pilot batch. Set the schedule around the slowest step, such as skilled stitching or hand-finished edges.

What belongs in a production cost estimate?

Include material yield, labor time, hardware, packaging, and rework. Track actual hours and scrap, because early estimates are often wrong.

Conclusion

Successful Custom Leather Goods Manufacturing begins with clearly defined product requirements and customization goals. Decide how the goods should look, function, and feel, then select leather, hardware, and supporting materials that suit those needs. Thoughtful material choices help balance appearance, durability, comfort, and cost. Developing patterns and prototypes allows design details to be tested and refined before production specifications are finalized.

Consistent results also depend on skilled craftsmanship and clear quality standards. Establish practical checks for materials, construction, finishing, and overall dimensions so each item meets the intended requirements. Finally, plan production capacity, lead times, and costs in advance. A realistic schedule and budget help coordinate the work, manage expectations, and support a smooth process from the first sample through completed goods.


Alric

Alric

Alric is a professional marketing specialist dedicated to helping businesses understand how thoughtful strategy, reliable products, and meaningful customer experiences work together to create lasting value. With extensive knowledge of the company’s solutions, Alric regularly contributes expert......